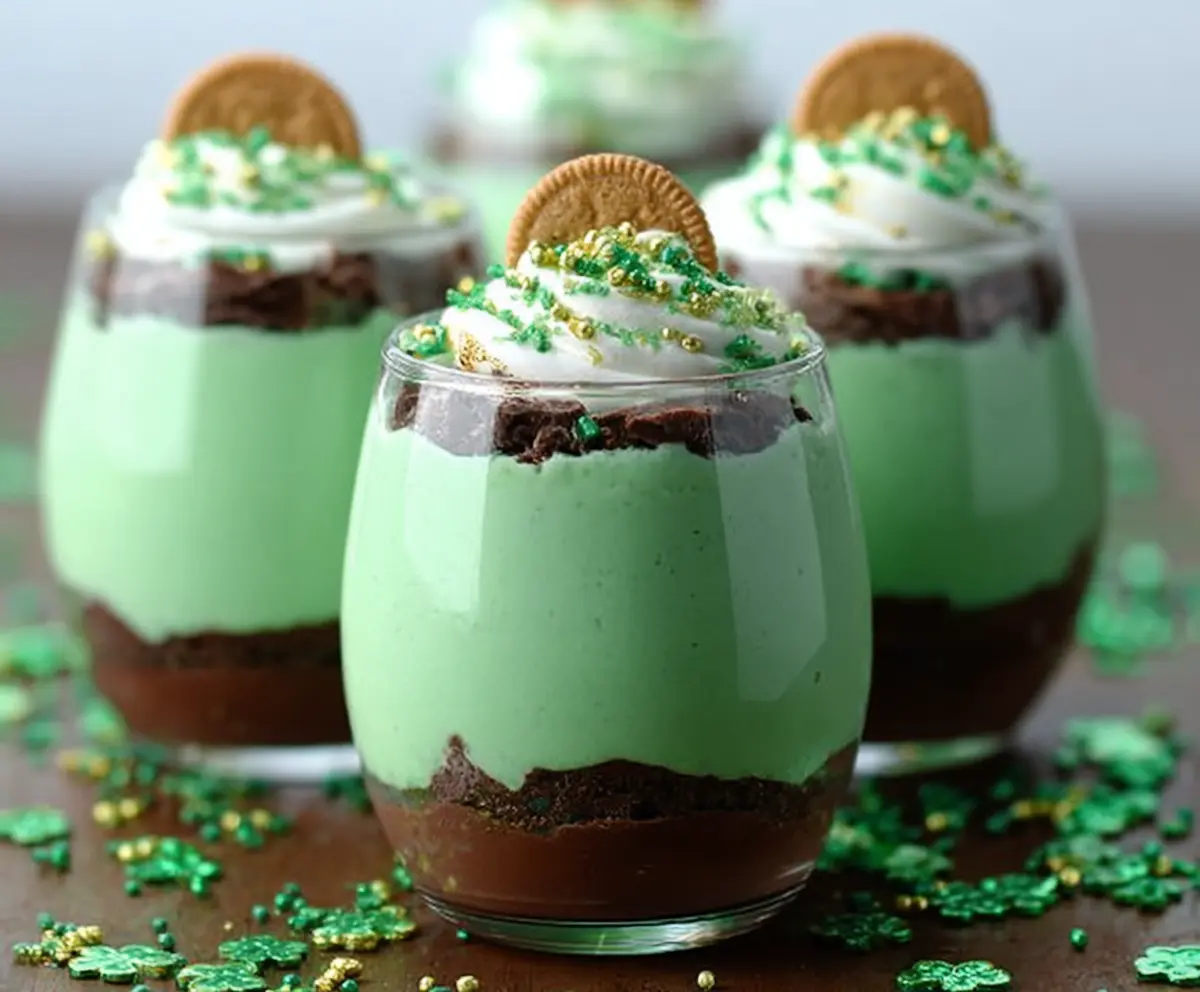
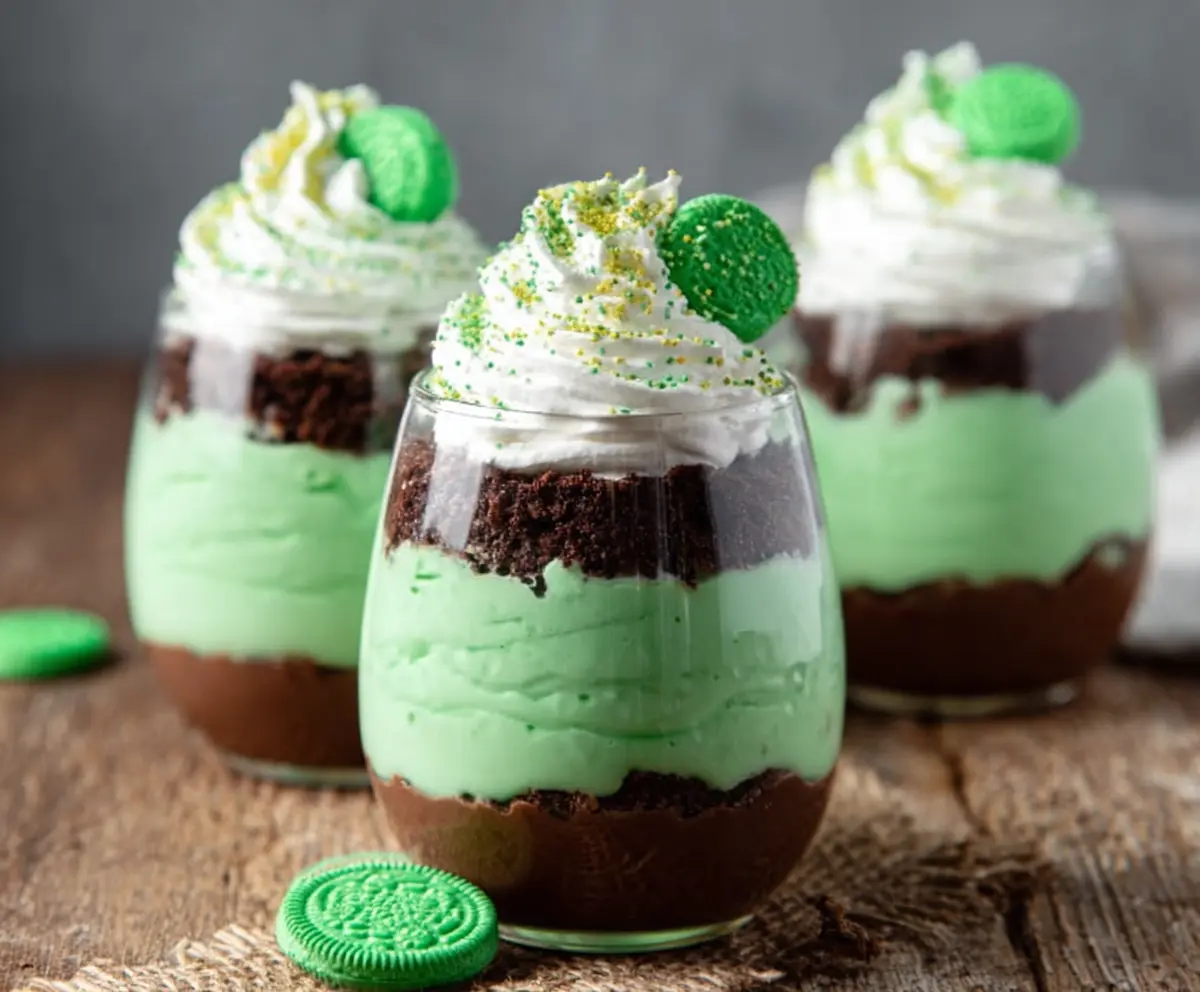
St Patrick’s Day Green Shake Pudding Cups are fun and festive treats perfect for celebrating the holiday. These cups bring together smooth, creamy pudding with a bright green twist that’s sure to catch everyone’s eye. With a little shake to mix it up, they’re super easy to make and even easier to enjoy.
I love making these pudding cups because they’re a simple way to add a playful touch to any St Patrick’s Day gathering. Plus, they’re a hit with both kids and adults—everyone loves that pop of green and the creamy texture. My secret? Giving each cup a little shake before serving to make sure the flavors blend just right and the pudding is perfectly smooth.
These Green Shake Pudding Cups are great served chilled, straight from the fridge with a spoon in hand. They’re ideal for a quick dessert that feels special but doesn’t require much fuss. I often keep a batch ready whenever we want a cheerful treat that matches the holiday spirit and brings smiles all around.
Key Ingredients & Substitutions
Chocolate pudding mix: This gives the dessert a rich, creamy chocolate layer. If you want a dairy-free option, look for coconut or almond milk pudding mixes.
Chocolate sandwich cookies: They add texture and crunch. If Oreo cookies aren’t your favorite, try any other chocolate wafer cookie, or gluten-free versions.
Pistachio pudding mix: It provides the signature green color and a subtle nutty flavor. You can swap this with vanilla pudding plus green food coloring for the same look but simpler taste.
Heavy cream and powdered sugar: Whipping these creates a light topping that balances the pudding layers. For a lighter option, use whipped coconut cream or a non-dairy whipped topping.
Green and gold sprinkles: Great for decoration and festive color. If you want an allergy-friendly choice, opt for natural, dye-free sprinkles or fresh mint leaves instead.
How Do You Layer Pudding Without Mixing the Colors?
To keep the bright colors neat and separate in the cups, it helps to work with pudding that’s thick enough. Let each layer set for a few minutes in the fridge before adding the next to avoid colors blending.
- Start with the cookie crumbs as a dry base—they help hold layers.
- Spoon pudding gently over the back of a spoon to slow the pour and reduce splashing.
- Refrigerate layers briefly to thicken without fully setting.
- If needed, use a piping bag or zip-top bag with a corner snipped for more control.
- Patience is key! Let each layer settle before the next.
Equipment You’ll Need
- Medium mixing bowls – I prefer these because they make whisking and mixing different pudding layers easy and mess-free.
- Whisk or hand or electric mixer – helps whip the heavy cream smoothly and quickly for a fluffy topping.
- Serving glasses or small cups – clear ones show off the colorful layers beautifully.
- Spoons or piping bags – useful for gently layering pudding or adding whipped cream neatly.
- Cookies or sprinkles for garnish – fun to have ready for decorating your pudding cups.
Flavor Variations & Add-Ins
- Chocolate and mint – add a few drops of peppermint extract to the chocolate pudding for a fresh twist.
- Skittles or candies – crush and sprinkle on top for extra color and a little fruity crunch.
- Caramel or salted caramel drizzle – swirl it into the pudding layers for a sweet, salty contrast.
- Fresh fruit – top with chopped strawberries or blueberries for a fresh, juicy flavor that brightens the pudding.
Equipment You’ll Need:
- Medium mixing bowls – great for mixing pudding and whipping cream
- Whisk or electric hand mixer – to blend pudding smoothly and whip cream to soft peaks
- Serving glasses or small clear cups – to show off the pretty layers
- Spoons or piping bags – for layering the pudding and adding whipped cream neatly
- Measuring cups and spoons – to get ingredient amounts just right
Delicious Variations to Try:
- Mint chocolate: Add a teaspoon of peppermint extract to the chocolate pudding layer for a refreshing minty flavor.
- Fruit topping: Add fresh chopped strawberries, raspberries or kiwi on top with the whipped cream for a fruity twist.
- Caramel drizzle: Drizzle caramel sauce over the whipped cream for a sweet and salty treat.
- Nutty crunch: Sprinkle chopped toasted pecans or almonds over the top for some added texture.
- Non-dairy version: Use coconut milk pudding mixes and coconut whipped cream for a dairy-free option.
Can I Use Vanilla Pudding Instead of Pistachio?
Yes! Simply use vanilla pudding and add a few drops of green food coloring to get that festive green hue without changing the texture or flavor too much.
How Long Can I Store These Pudding Cups?
Store them covered in the refrigerator for up to 2 days. The cookie layers might soften a bit over time but will still taste delicious.
Can I Make These Ahead of Time?
Absolutely! Assemble the pudding cups a few hours or even the day before. Just keep them refrigerated and add the whipped cream topping right before serving for the best texture.
What’s the Best Way to Crush the Cookies?
Place cookies in a zip-top bag and gently crush them with a rolling pin or the bottom of a glass. You want small crumbs, not a powdery texture for added crunch in the layers.