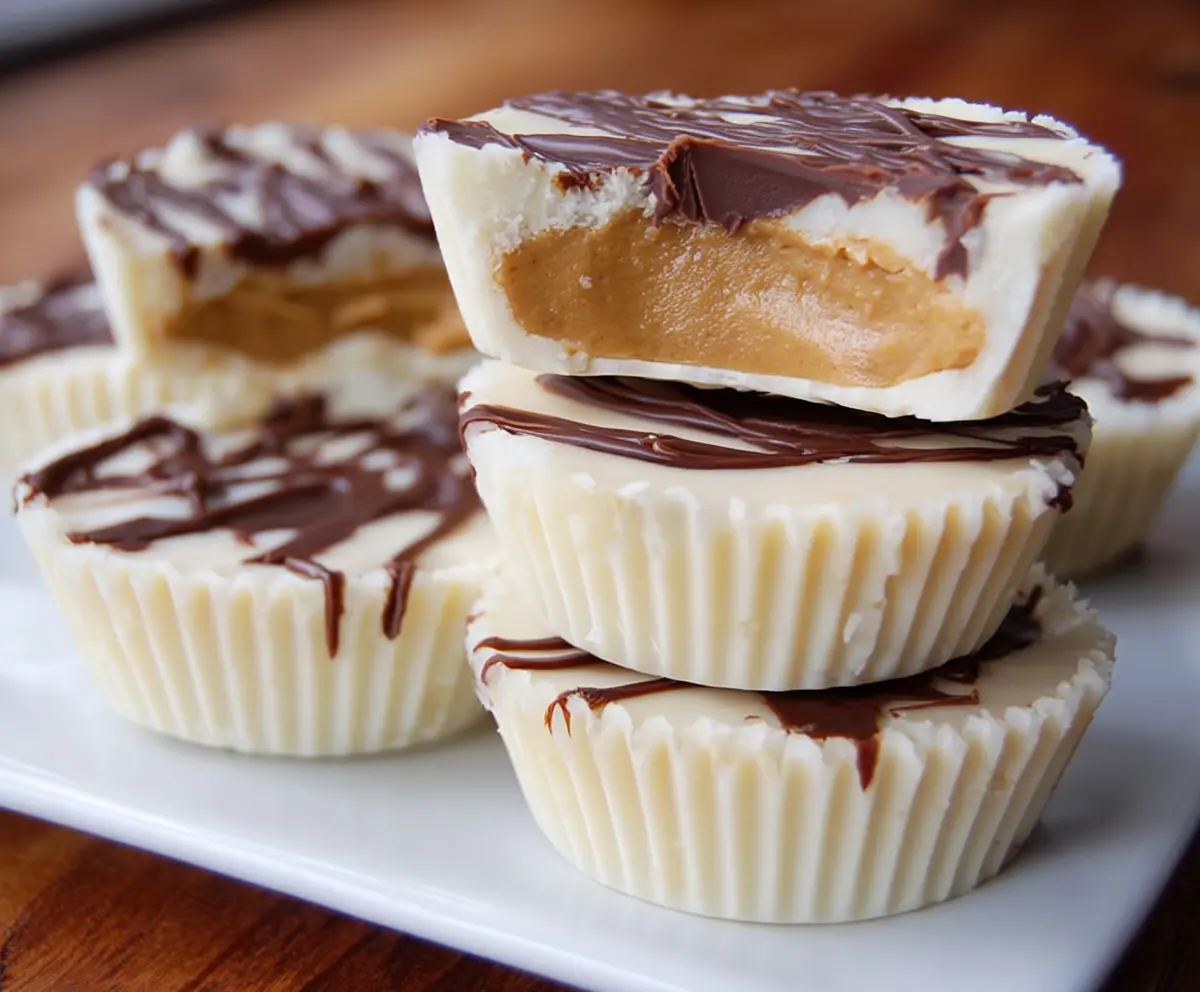
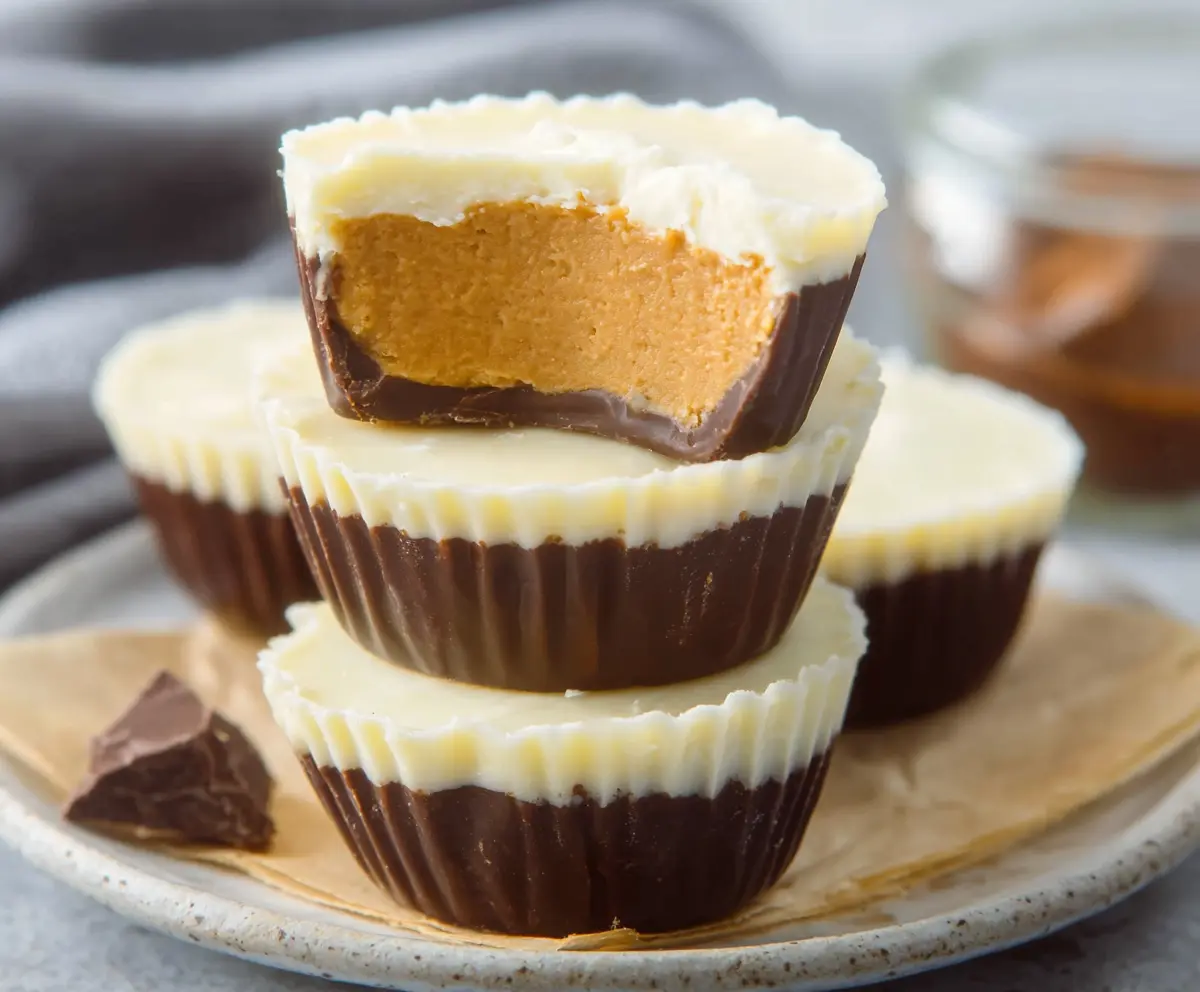
White Chocolate Peanut Butter Cups are the perfect little treat when you want something sweet and a bit creamy with a nutty twist. These cups combine the rich, smooth flavor of white chocolate with the classic saltiness of peanut butter, making every bite a nice balance of flavors and textures. The soft, melty peanut butter center inside a crisp white chocolate shell is simply irresistible.
I love making these peanut butter cups because they’re super easy to put together, and they never last long once people find out they’re around. A little tip I’ve learned is to chill them just enough so they hold their shape, but not too long so they stay soft and gooey in the center—this way, every bite is deliciously creamy without being too hard to bite into.
My favorite way to enjoy them is straight from the fridge, sometimes alongside a cup of coffee or tea. They’re also great to have on hand when you want to surprise friends or family with a quick homemade snack that feels special. Honestly, once you try these, you’ll find yourself looking for any excuse to make another batch soon!
Key Ingredients & Substitutions
White Chocolate: Use good-quality white chocolate chips for creaminess and sweetness. If you can’t find white chocolate, white chocolate-flavored almond bark works well too. Just avoid candy melts as they can be waxy.
Peanut Butter: I prefer natural peanut butter for a rich, authentic flavor. Smooth or creamy peanut butter works best for easy spreading. If you have allergies, try sunflower seed butter or almond butter instead.
Powdered Sugar: This sweetens the peanut butter mixture and helps it firm up nicely. If you don’t have powdered sugar, a small amount of honey or maple syrup can work, but the filling may be softer.
Butter: A bit of unsalted butter adds richness and helps the filling set better. You can substitute margarine or coconut oil if you prefer a dairy-free option.
Dark Chocolate: The drizzle adds a lovely contrast in both color and taste. Use semi-sweet, dark, or even milk chocolate depending on your preference. This step is optional if you want a plain look.
How Can I Make Smooth, Even Layers in My Peanut Butter Cups?
Getting each layer neat and even keeps your peanut butter cups looking like they came from a candy shop! Here’s how I do it:
- After melting the white chocolate, use the back of a spoon to spread it evenly in the liners. Chill it well until firm before adding peanut butter.
- For the peanut butter layer, don’t overfill; a tablespoon usually fits nicely. Press it gently but firmly so it sticks well without bulging.
- When adding the final white chocolate layer, pour slowly and tap the tray on your countertop to help the chocolate settle smoothly.
- Chill each layer properly before adding the next – patience here makes a huge difference in the final shape.
These small steps stop chocolate from mixing into the peanut butter and keep those distinct layers you want in your cups!
Equipment You’ll Need
- Mini muffin tin – I use this because it creates perfectly sized cups that are easy to eat and serve.
- Paper cupcake liners – help keep the chocolate from sticking and make cleanup easier.
- Microwave-safe bowl – makes melting the chocolate quick and simple with no extra equipment needed.
- Small spatula or spoon – useful for spreading the chocolate evenly and adding the peanut butter filling.
- Refrigerator – essential to chill the cups between layers so everything sets perfectly.
Flavor Variations & Add-Ins
- Use milk or dark chocolate instead of white for a classic flavor switch.
- Add chopped nuts or crispy rice cereal into the peanut butter for some crunch.
- Mix in a little cinnamon or vanilla to the peanut butter for extra flavor.
- Top with sea salt or crushed pretzels before the final layer for a salty-sweet combo.
White Chocolate Peanut Butter Cups
Ingredients You’ll Need:
For the White Chocolate Cups:
- 2 cups white chocolate chips or chopped white chocolate
For the Peanut Butter Filling:
- 1/2 cup creamy peanut butter (preferably natural or unsweetened)
- 2 tablespoons powdered sugar
- 2 tablespoons unsalted butter, softened
- 1/2 teaspoon vanilla extract
- Pinch of salt
For the Decoration:
- 2 ounces semi-sweet or dark chocolate (for drizzling on top)
How Much Time Will You Need?
This recipe takes about 25 minutes to prepare, including melting and layering the chocolate and peanut butter. You’ll also need an additional 35 minutes for chilling between steps to get those perfect, firm layers. So, plan for about 1 hour total from start to finish.
Step-by-Step Instructions:
1. Prepare Your Cup Liners:
Line a mini muffin tin with paper cupcake liners and set it aside. This will help shape your peanut butter cups and keep them from sticking.
2. Melt the White Chocolate:
Place the white chocolate chips in a microwave-safe bowl. Microwave in 30-second bursts, stirring well between each, until the white chocolate is melted and smooth.
3. Make the Base Layer:
Drop about 1 tablespoon of the melted white chocolate into the bottom of each cupcake liner. Use the back of a spoon to spread it evenly, covering the bottom. Chill the tin in the refrigerator for 10 minutes, so the chocolate hardens.
4. Prepare the Peanut Butter Filling:
In a bowl, mix the peanut butter, powdered sugar, softened butter, vanilla extract, and a pinch of salt until the mixture is smooth and creamy.
5. Add the Peanut Butter Layer:
Once the white chocolate base is firm, spoon about 1 tablespoon of peanut butter filling onto each chocolate base. Press gently and evenly to make a smooth layer.
6. Cover with White Chocolate:
Warm the remaining white chocolate briefly in the microwave to keep it melted. Spoon it over each peanut butter layer, covering them completely. Tap the muffin tin lightly on the counter to smooth the tops.
7. Chill to Set:
Return the tin to the refrigerator for about 15 minutes to allow the top white chocolate layer to harden.
8. Add Chocolate Drizzle:
Meanwhile, melt the semi-sweet or dark chocolate. Drizzle thin lines over the tops of each peanut butter cup for a pretty decorative touch.
9. Final Chill and Serve:
Chill the decorated cups for another 10 minutes until the drizzle sets. Then, remove the cups from their liners and enjoy! Store any leftovers in an airtight container in the refrigerator.
Can I Use Natural Peanut Butter for This Recipe?
Yes! Natural peanut butter works great and gives a rich, authentic flavor. Just make sure to stir it well before measuring since the oils may separate.
How Should I Store Leftover Peanut Butter Cups?
Store them in an airtight container in the refrigerator for up to one week. Let them sit at room temperature for a few minutes before eating if you prefer a softer texture.
Can I Freeze These Peanut Butter Cups?
Absolutely! Freeze them in a sealed container for up to 2 months. Thaw in the fridge overnight before enjoying to keep their texture perfect.
What Can I Substitute for White Chocolate?
You can use milk or dark chocolate instead for a different flavor. Just adjust sweetness to balance the richer chocolate tastes.